Creating custom splash pages with LinkPod is an excellent way to grab your audience's attention before they access your main content. Whether it's for promotional purposes, showcasing offers, or just conveying a custom message, splash pages can significantly enhance your digital marketing strategy. Here's a detailed guide on how to set up your own splash pages within LinkPod.
In this video, you will learn how to create custom splash pages using LinkPod. We will demonstrate how to create a splash page, add a logo, title, description, and a button with a URL. I'll also explain how to set auto redirect and countdown timer options.
Step 1: Navigate to the Splash Pages Tab
First, log in to your LinkPod account and locate the splash pages tab on the left-hand menu. This is your starting point for creating a new splash page.

Step 2: Create Your Splash Page
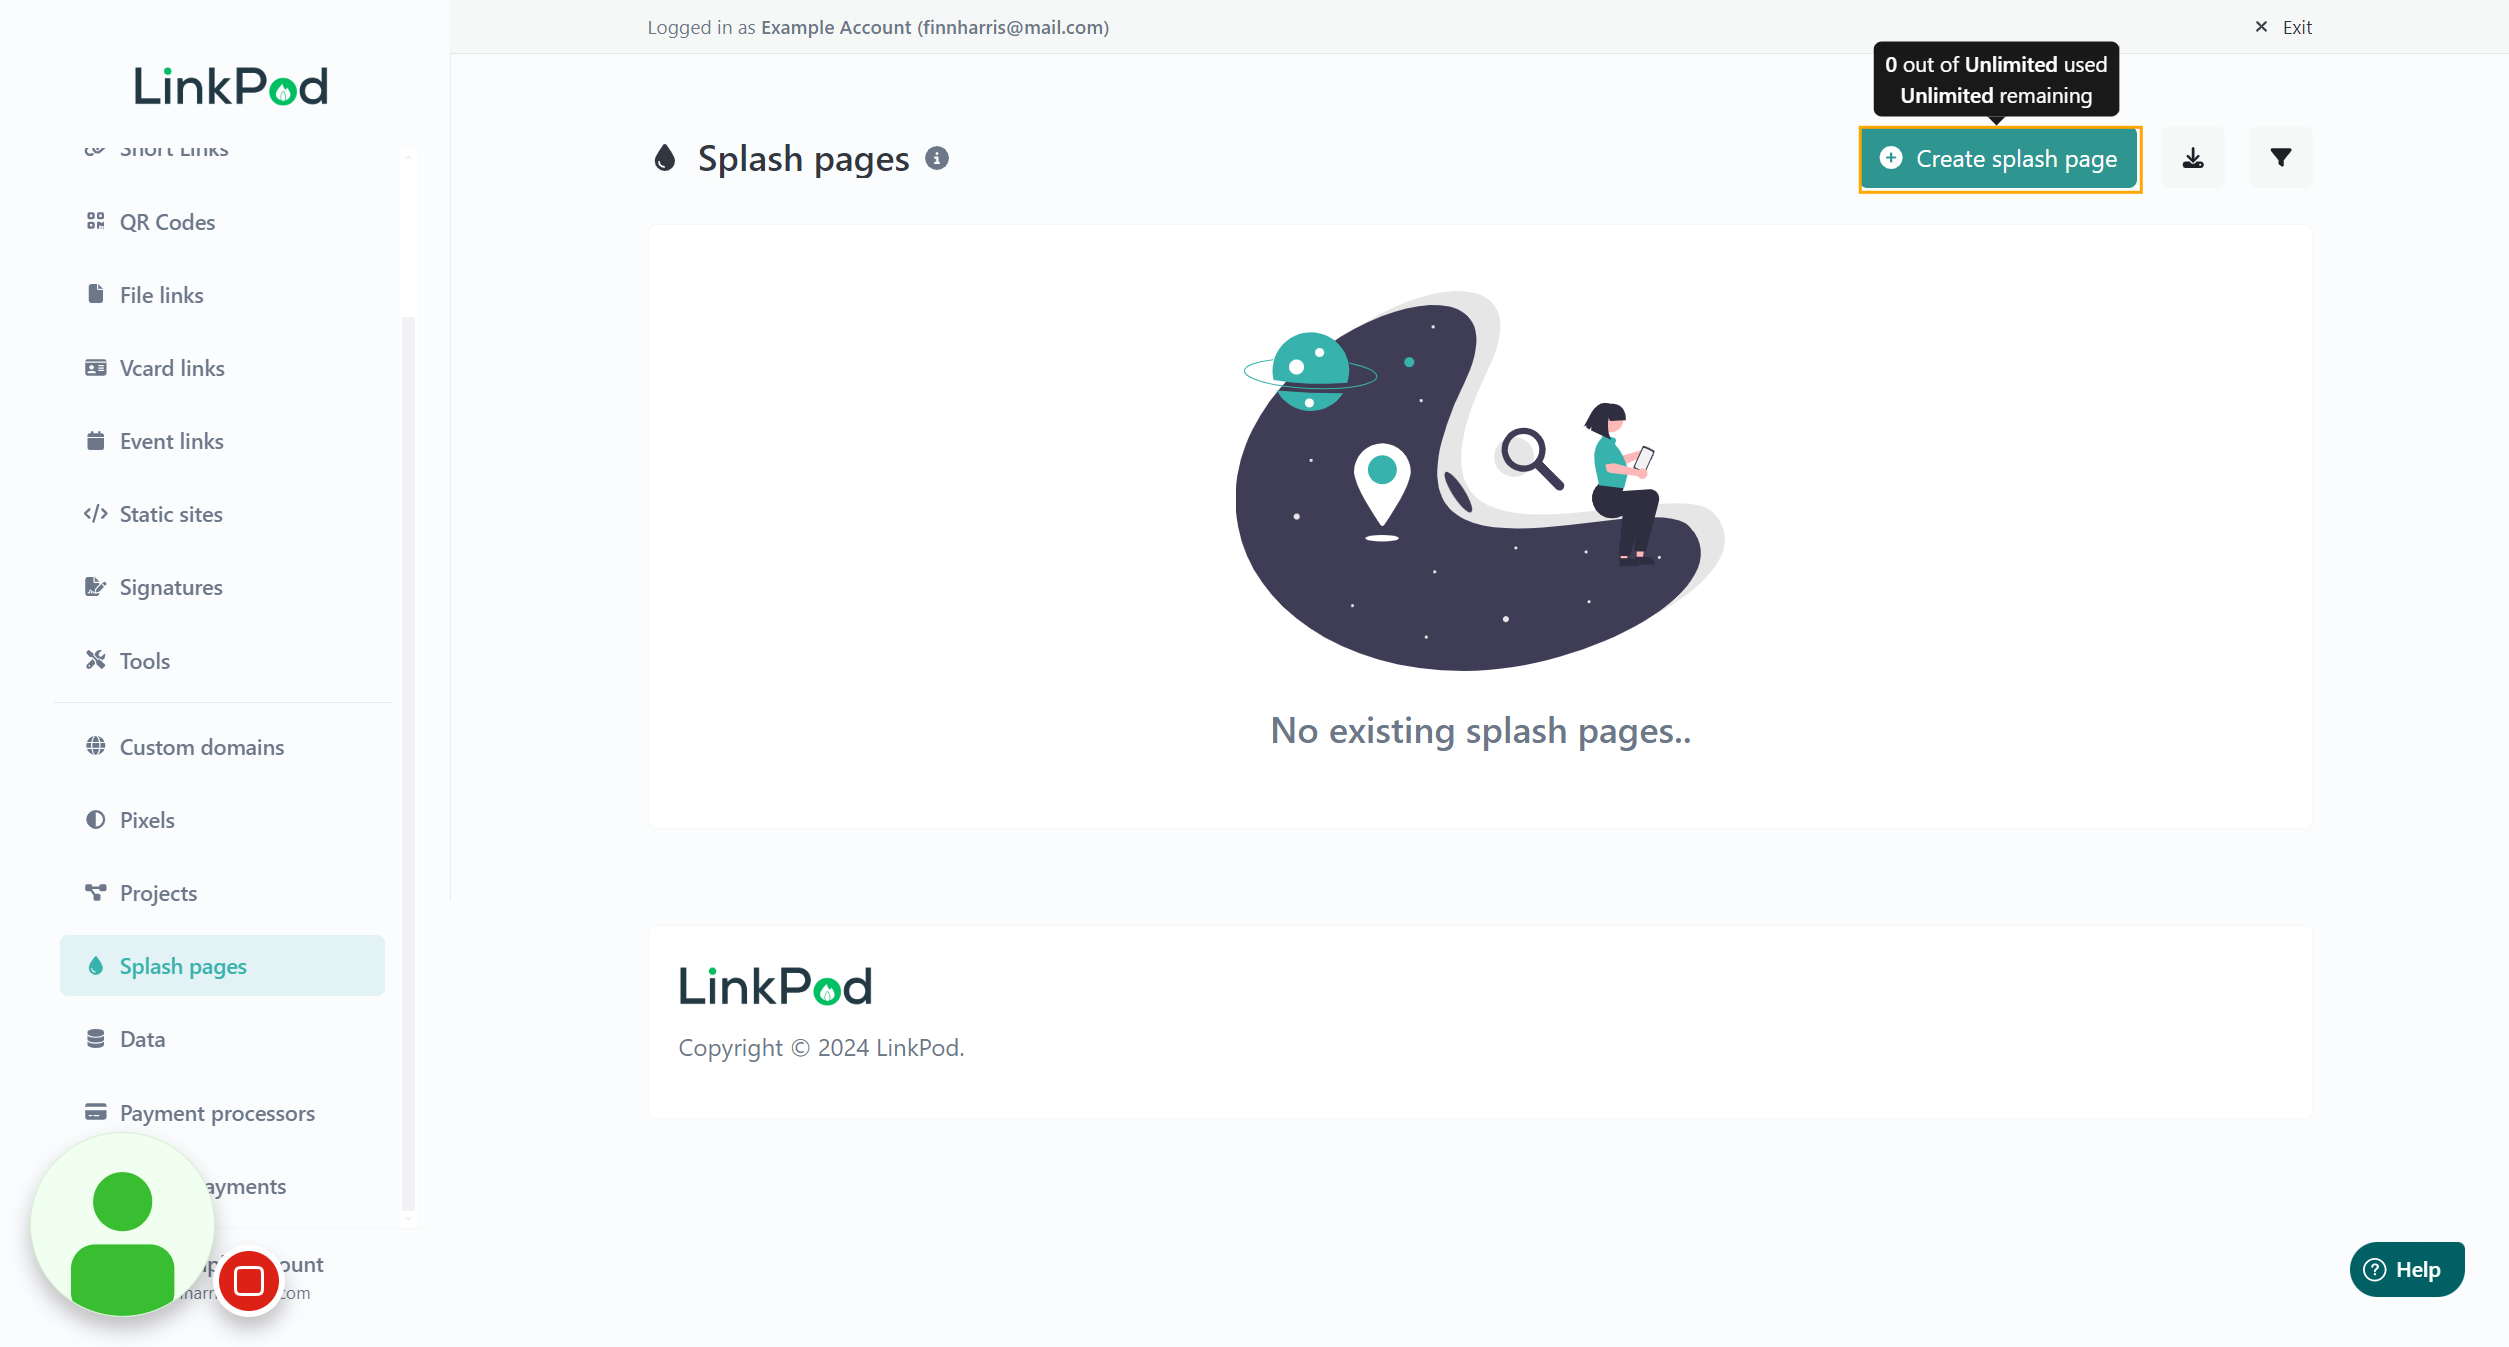
Click on the "Create Splash Page" button to begin the process. You'll be prompted to fill in several details to customize your splash page:
- Name Your Splash Page: Choose a descriptive name for your splash page, such as "View Products." This name will help you identify the splash page in your dashboard.
- Add a Logo: Click on the "Choose File" button to upload a logo. This logo will appear on your splash page, adding a visual element that can make your page more engaging.
- Title and Description: Enter a title for your splash page, like "Check out our latest product." Below the title, add a description to give more context about your message or offer, such as "We've got some great offers available."
- Button Text and URL: Specify the text for the call-to-action button, e.g., "Click here to browse." Then, input the URL where users will be directed after interacting with your splash page. This could be a products page or any other relevant landing page.
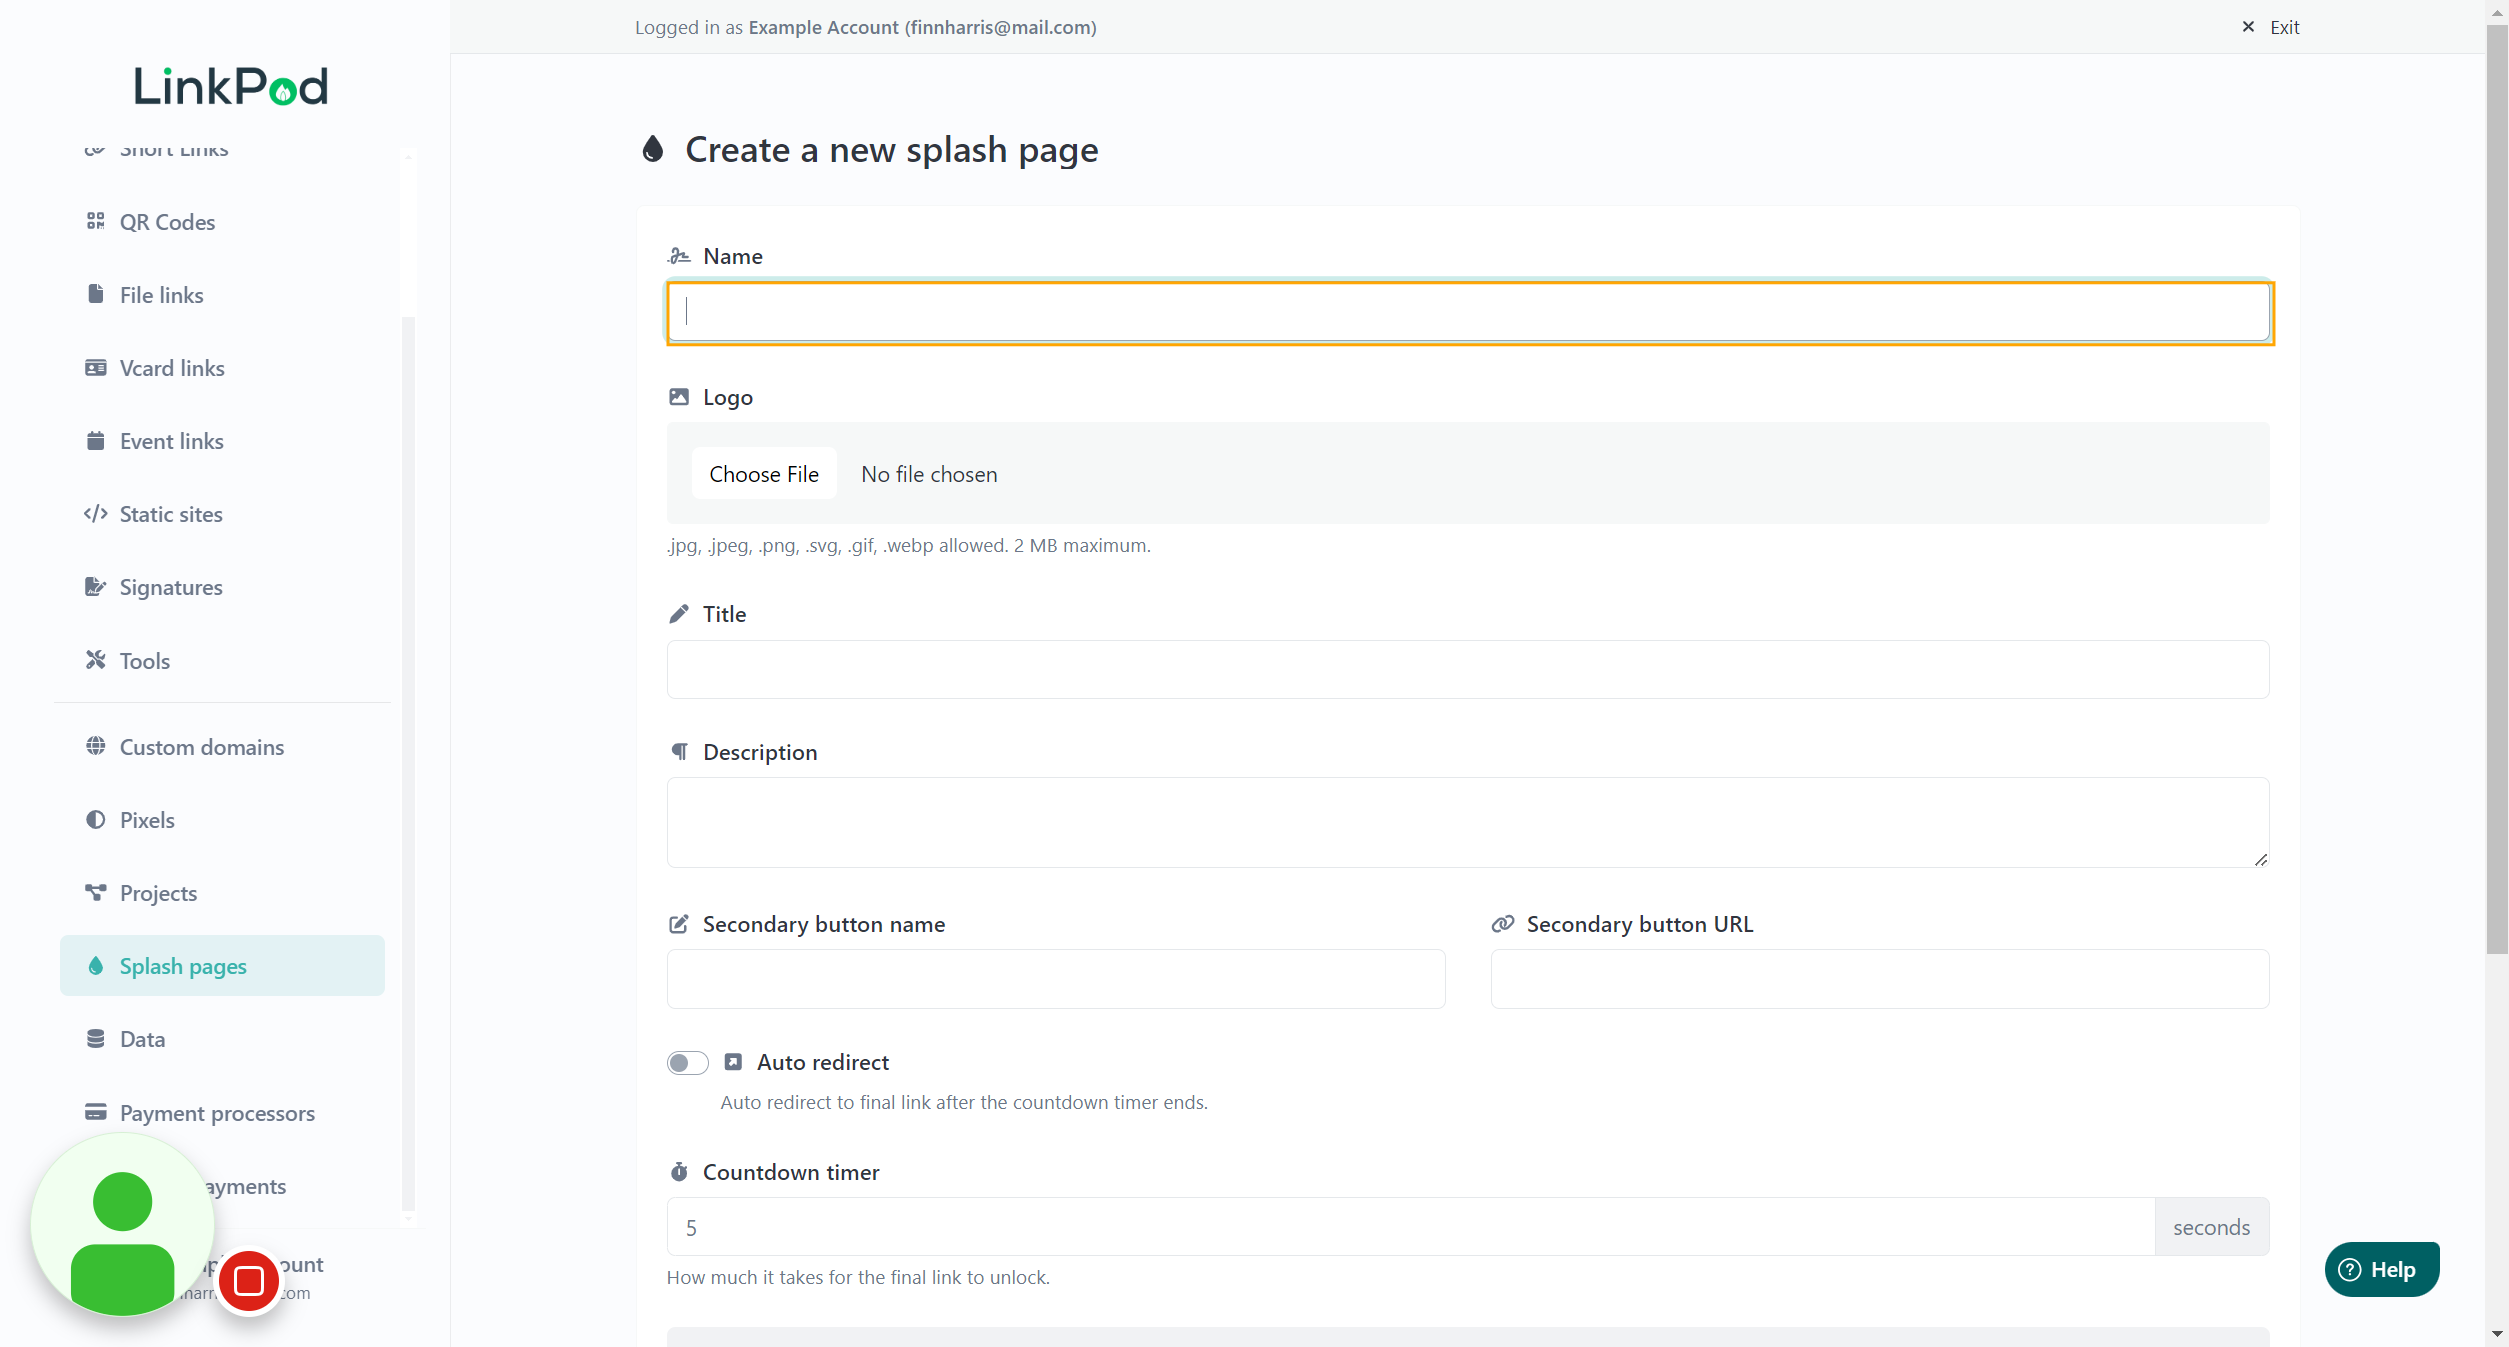
Step 3: Set Auto Redirect (Optional)
Decide whether you want your splash page to auto-redirect visitors after a certain period. If you choose to enable auto-redirect, set a countdown timer in seconds. This feature allows you to display the splash page for a set duration before automatically taking the visitor to the specified URL. Alternatively, you can disable auto-redirect, requiring users to click the continue button to proceed.
Step 4: Finalize Your Splash Page
After customizing your splash page, click on the "Create" button to save your changes. Your splash page is now ready to be linked to your short links or link-in-bio pages.
Step 5: Link the Splash Page to Your Content
To apply your new splash page to a short link:
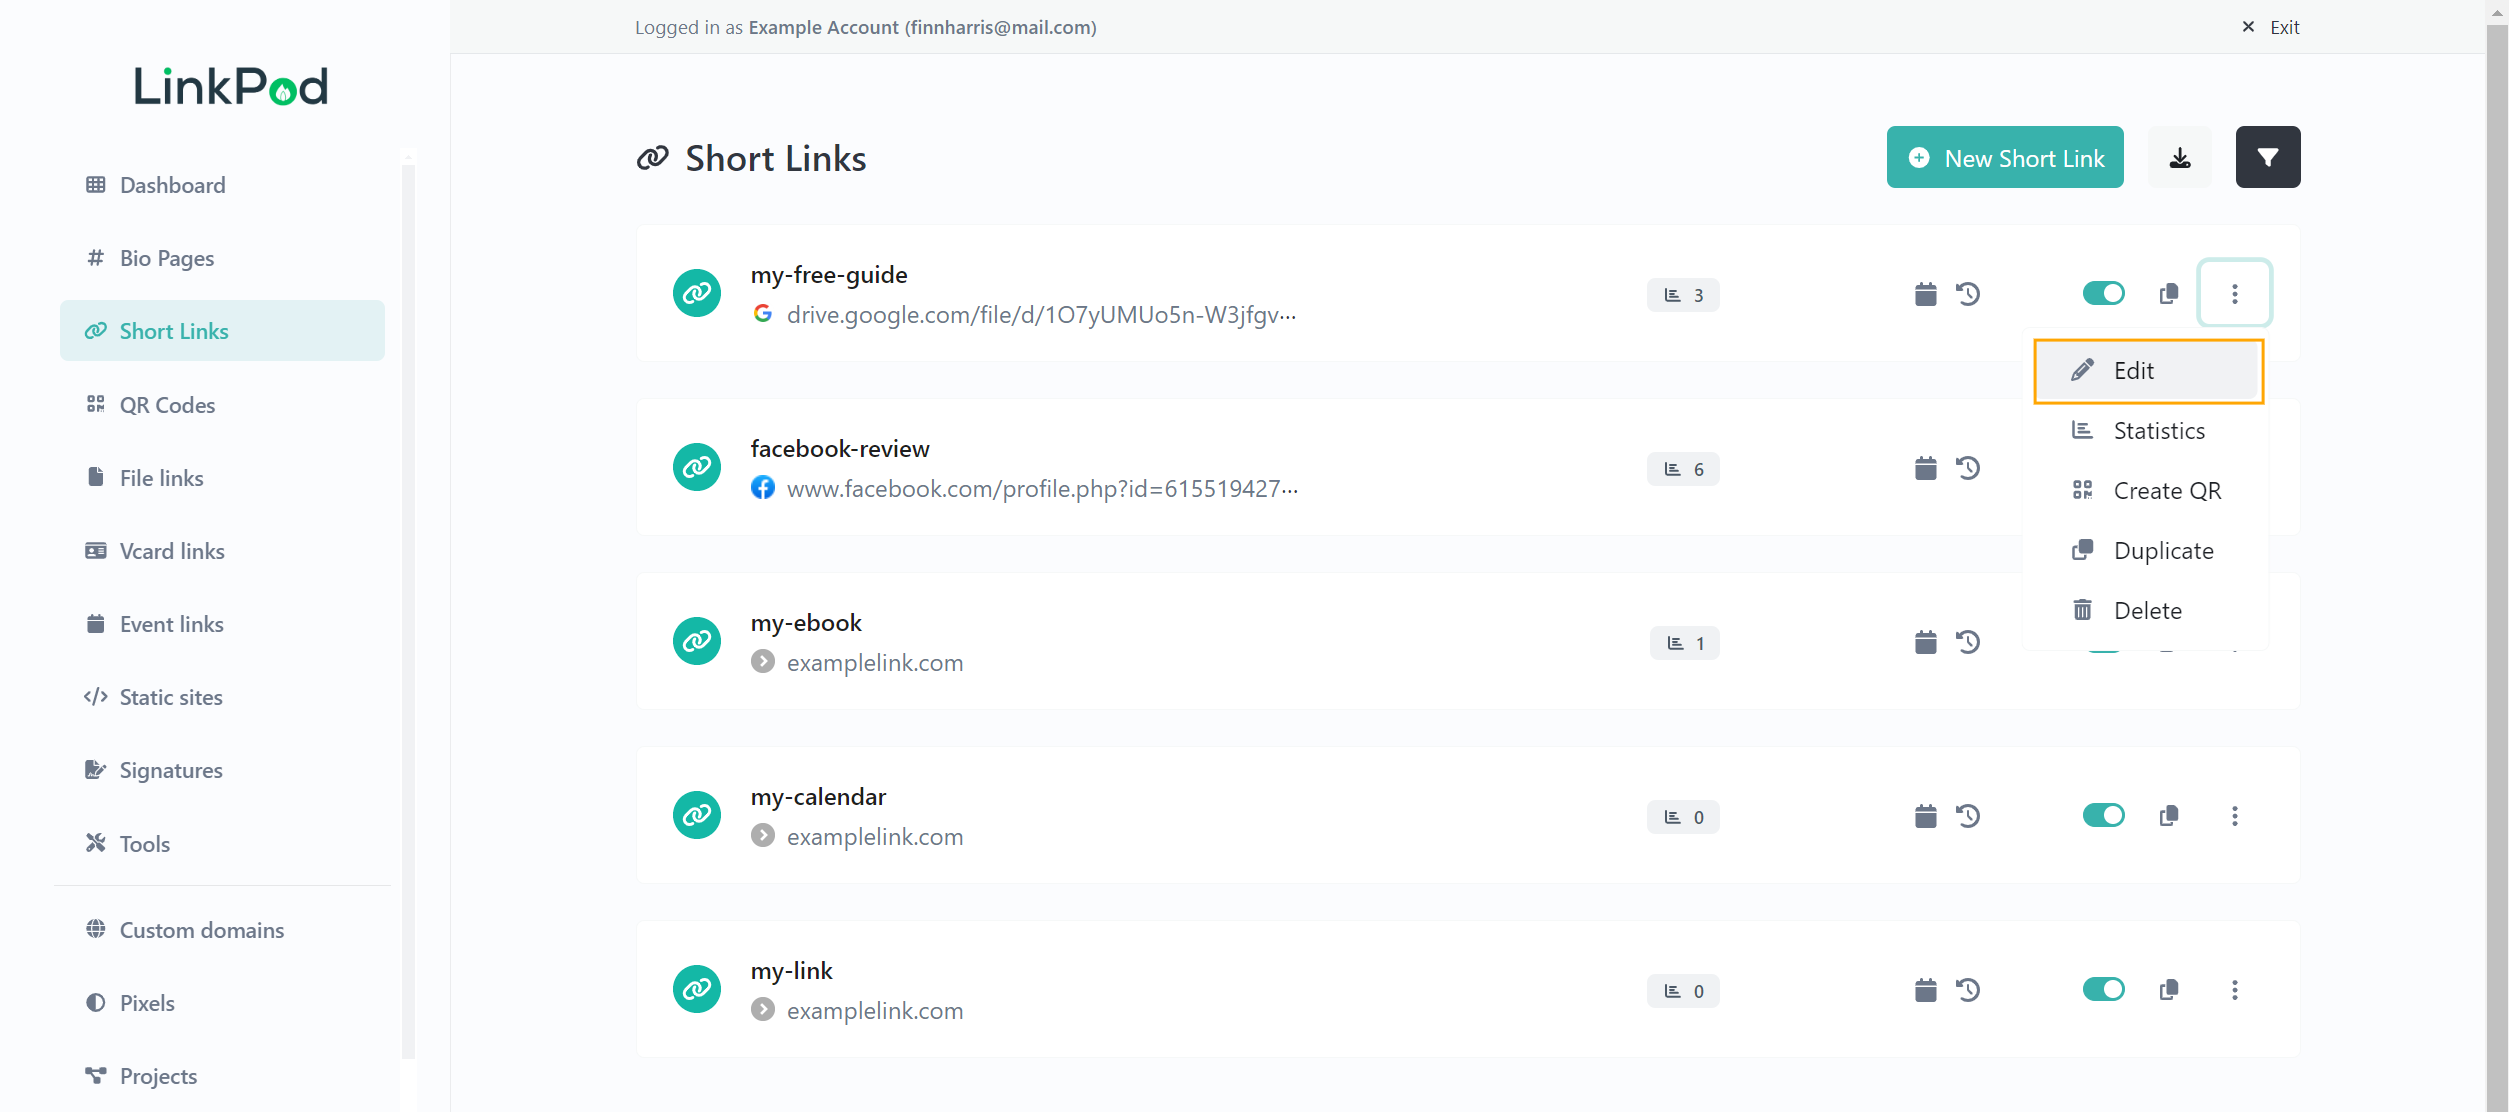
- Navigate to the short link (or bio page) you wish to add the splash page to.
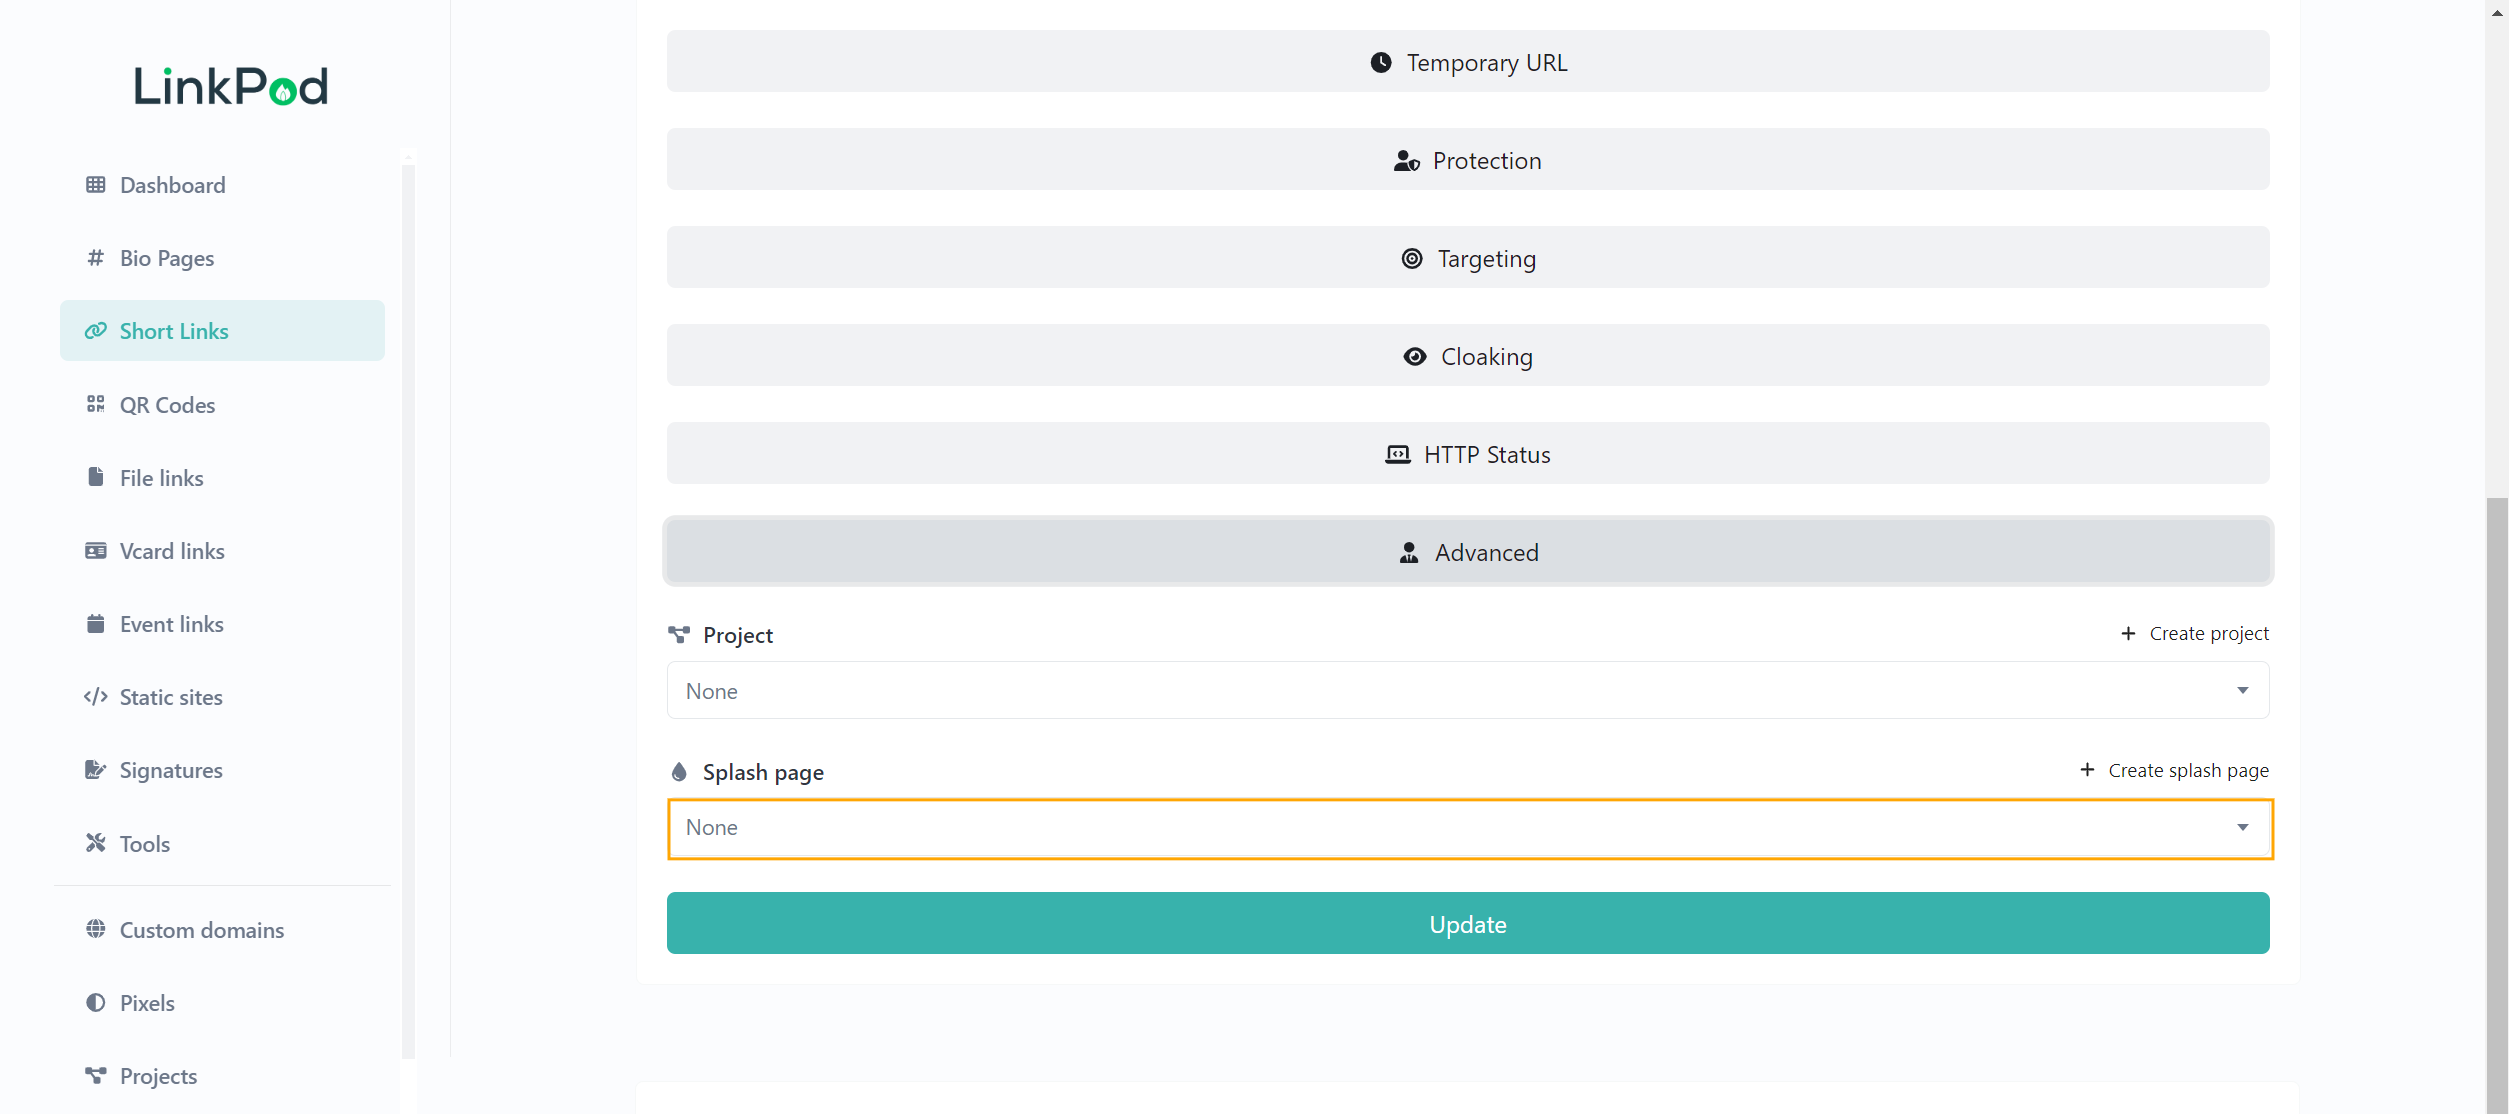
- Click on "Edit Link" and scroll down to the "Advanced" section.
- Find the splash page option and select your newly created splash page from the dropdown menu.
- Click "Update" to apply the changes.
Now, when users click on the specified short link, they will first encounter your custom splash page. If you've set an auto-redirect, they will be taken to the target page after the specified time. Otherwise, they will need to click on the provided button to continue.
Conclusion
Splash pages are a powerful tool for engaging your audience right before they access your main content. By following the steps outlined above, you can effectively create and implement custom splash pages using LinkPod. This feature is particularly useful for promoting offers or displaying custom messages, enhancing your overall digital marketing efforts.