Adding payment processors to your LinkPod account is crucial for enabling online transactions and managing payments efficiently. Follow this guide to set up various payment processors like PayPal, Stripe, and more on your LinkPod account.
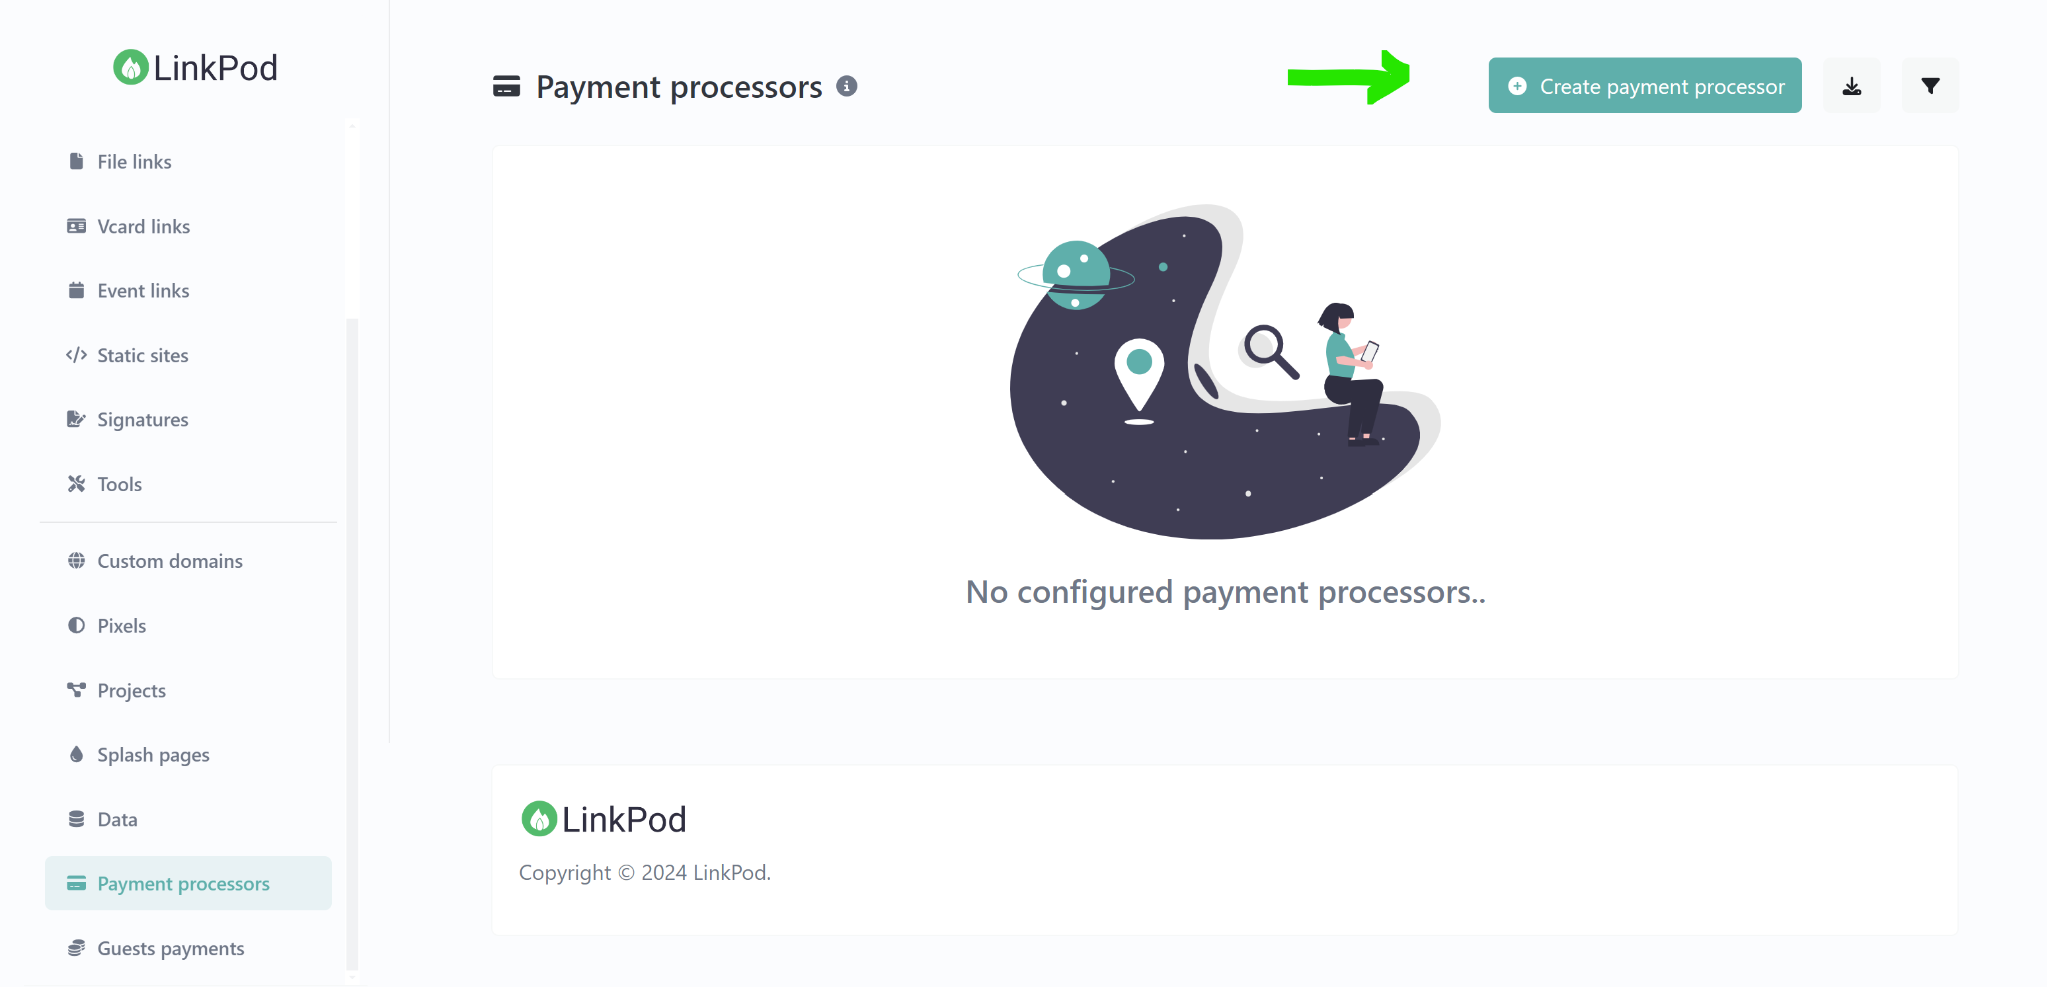
Step 1: Accessing Payment Processors
- Navigate to the Payment Processors Page
- Log in to your LinkPod account.
- From the left-hand menu, select "Payment processors."
- Click on 'Create Payment Processor'
- On the Payment Processors page, click the "Create payment processor" button located at the top right of the page.
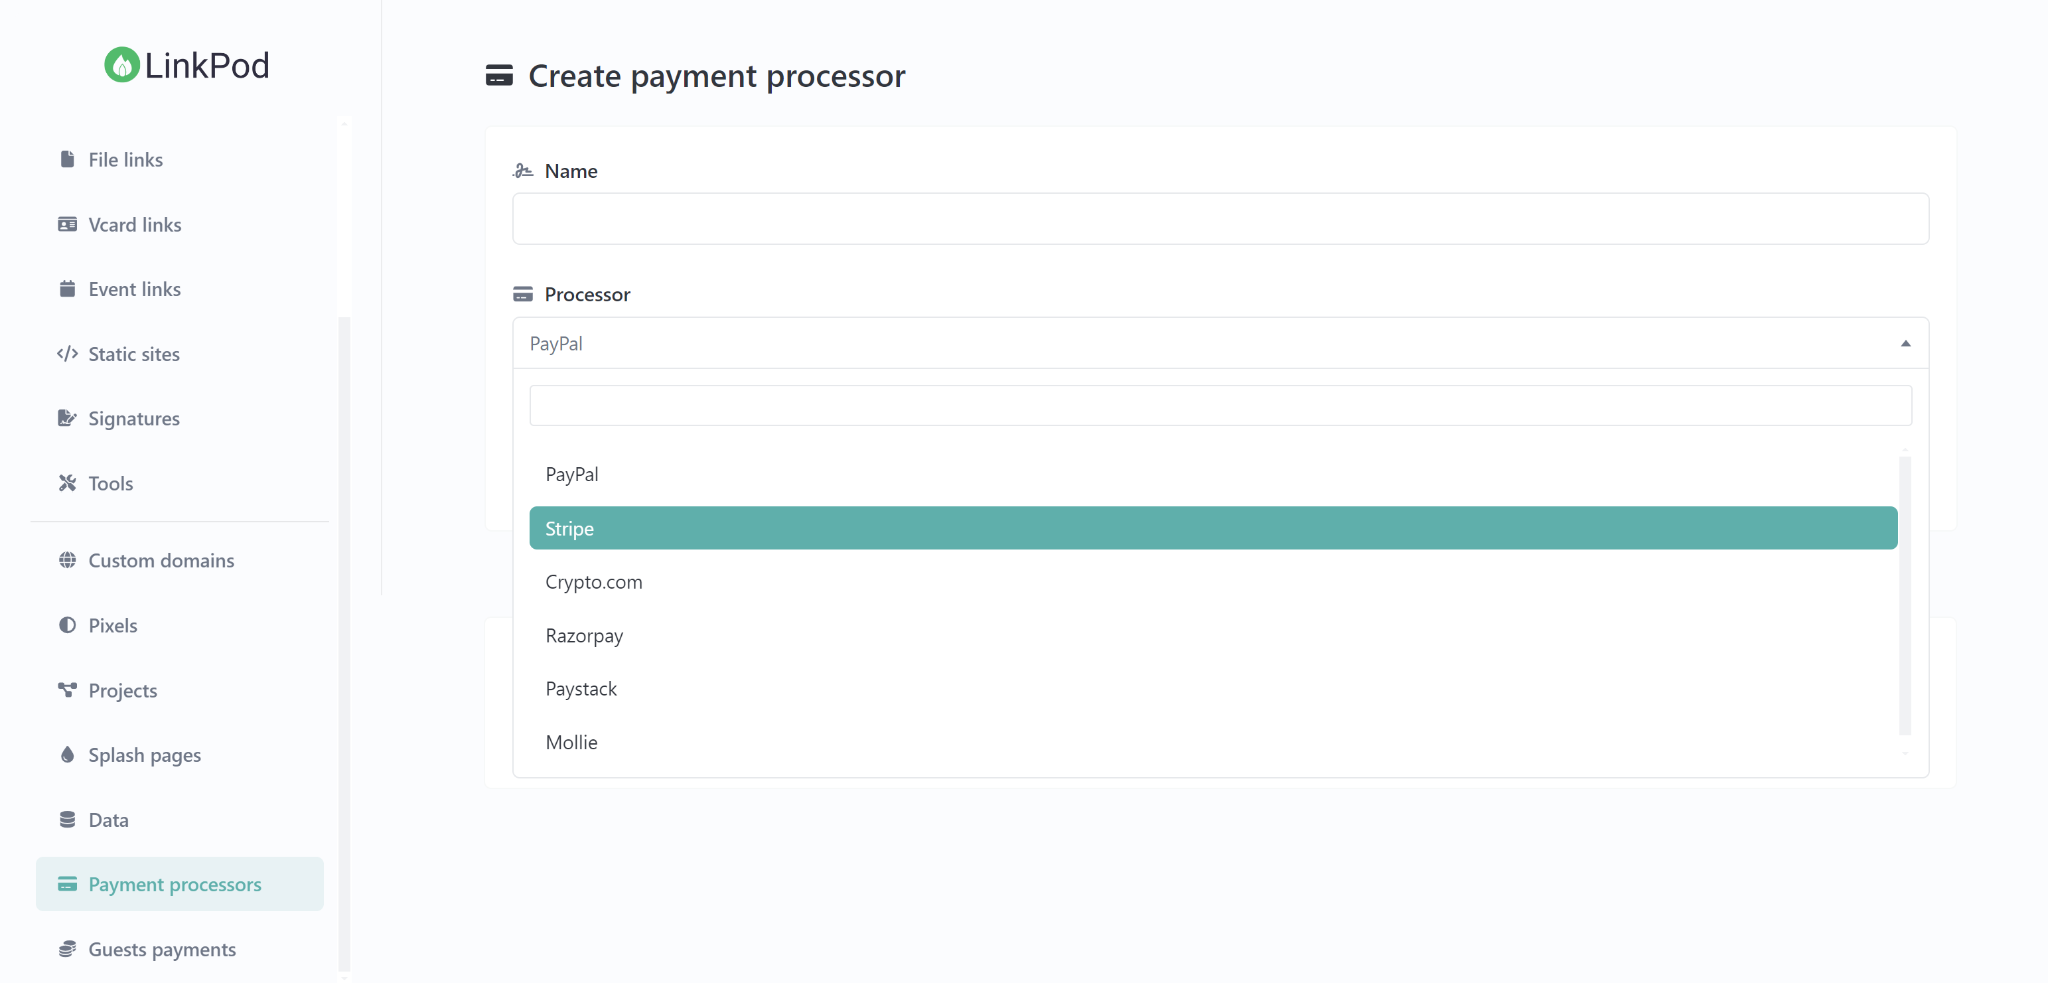
Step 2: Selecting and Naming Your Payment Processor
- Choose Your Payment Processor
- In the "Create payment processor" window, select your desired processor from the dropdown menu. Options include PayPal, Stripe, Crypto.com, Razorpay, Paystack, and Mollie.
- Enter a custom name for the payment processor. This name will help you identify the processor in your account.
- Click 'Create'
- After entering the required details, click "Create" to save your payment processor and proceed with the configuration.
Step 3: Configuring Your Payment Processor
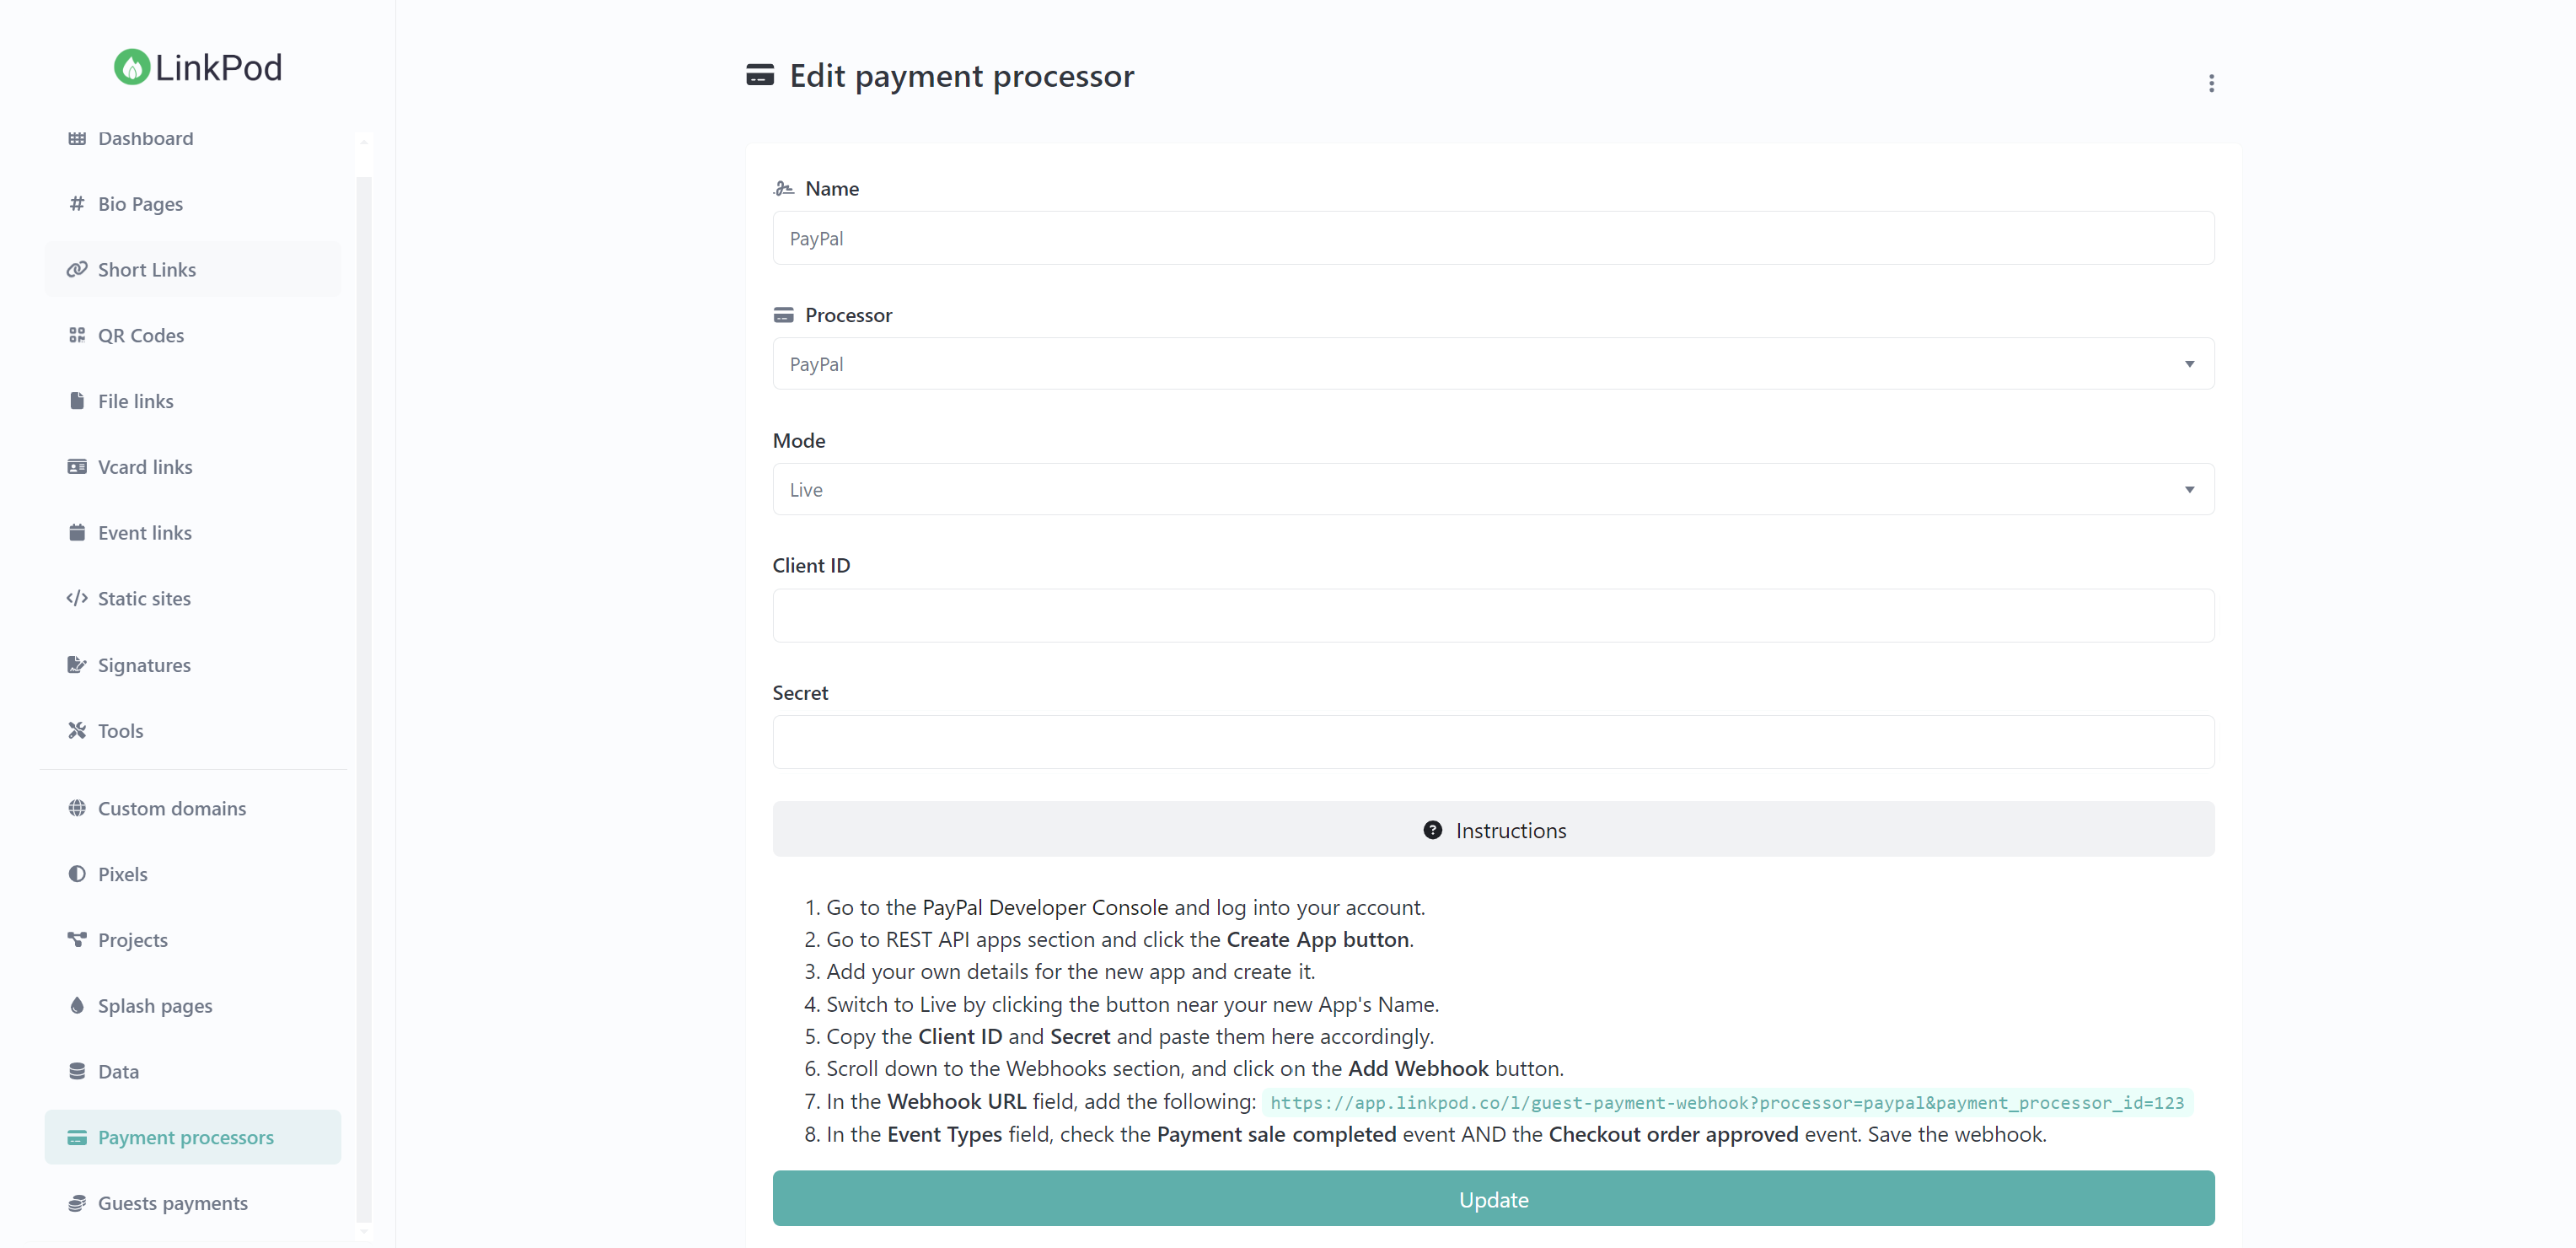
PayPal
- Enter PayPal Details
- Provide your PayPal Client ID and Secret.
- Choose the mode (Live or Sandbox) for testing or live transactions.
- Follow Integration Instructions
- Go to the PayPal Developer Console and log in to your account.
- Go to REST API apps section and click the Create App button.
- Add your own details for the new app and create it.
- Switch to Live by clicking the button near your new App's Name.
- Copy the Client ID and Secret and paste them here accordingly.
- Scroll down to the Webhooks section and click on the Add Webhook button.
- In the Webhook URL field, add the provided URL. The webhook URL is unique to your account, you will find it by clicking on the "Instructions" tab.
- In the Event Types field, check the Payment sale completed event AND the Checkout order approved event. Save the webhook.
Stripe
- Provide Stripe API Keys
- Input your Stripe Publishable Key and Secret Key.
- Include the Webhook Secret for secure communication.
- Follow these instructions for setup:
- Go to the Stripe Dashboard and log in to your account.
- Go to the API Keys page.
- Ensure your API keys are set to Live Mode to accept real payments.
- Copy the Publishable Key and Secret Key and paste them here.
- Go to the Developers page, then go to the Webhooks page.
- Click on the Add endpoint button.
- In the Endpoint URL field, add the provided URL. The endpoint URL is unique to your account, you will find it by clicking on the "Instructions" tab.
- In the Events section, check the "checkout.session.completed" event, and save the webhook.
- Reveal the Signing secret, copy it, and paste it here accordingly.
Crypto.com
- Enter API Key Details
- Add your Publishable Key and Secret Key from Crypto.com.
- Configure the Webhook Secret for secure data exchange.
- Follow these steps:
- Go to the Crypto.com Merchant and log in to your account.
- Go to the Developers page.
- Copy the Publishable Key and Secret Key and paste them here.
- Go to the Webhooks tab and click on the Add webhook button.
- In the Webhook URL field, add the provided URL. The webhook URL is unique to your account, you will find it by clicking on the "Instructions" tab.
- Copy the Signature secret key after adding the webhook and paste it here.
Razorpay
- Add Razorpay Keys
- Provide the Key ID and Secret for Razorpay.
- Enter the Webhook Secret for secure communication.
- Follow these instructions:
- Go to Razorpay and log in to your account.
- Go to the Settings page -> API Keys tab and generate your API keys.
- Copy the keys and paste them here.
- Go to the Settings page -> Webhooks tab and click on Add webhook.
- In the Webhook URL field, add the provided URL. The webhook URL is unique to your account, you will find it by clicking on the "Instructions" tab.
- Add a new Secret (like a password), check the payment_link.paid option, and save the webhook.
- Copy the Webhook secret key after adding the webhook and paste it here.
Paystack
- Enter Paystack Keys
- Add your Public Key and Secret Key from Paystack.
- Include the Webhook URL for secure notifications.
- Follow these instructions:
- Go to the Paystack page and log in to your account.
- Go to the Settings page -> API Keys & Webhooks tab on Paystack.
- Copy the keys and paste them here.
- Add the provided Webhook URL in the Webhook URL field. The webhook URL is unique to your account, you will find it by clicking on the "Instructions" tab.
Mollie
- Provide Mollie API Key
- Input your API Key from Mollie.
- Configure the integration by adding the provided webhook URL.
- Follow these instructions:
- Go to the Mollie Dashboard and log in to your account.
- Go to Developers -> API Keys page.
- Copy the API key and paste it here.
Step 4: Finalizing Configuration
- Verify and Save
- Double-check all the details you have entered for your chosen payment processor.
- Click "Update" to save the configuration and complete the setup.